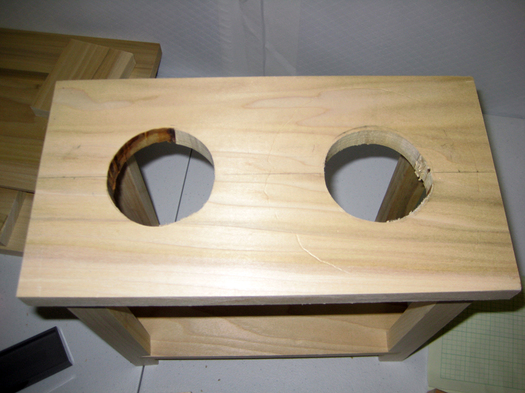
When I left off, the brew bar had all its pieces. But it was missing holes for the coffee to drip through. I started out trying to use my dremel circle cutter guide to cut circles, but the wood was just too thick to get a clean cut with the dremel. I got part way through with the cut, but it seemed to be burning its way through, not cutting. So I made a makeshift compass and drew a circle and made the cut with my jig saw. I wish I had started out this way, it was so much easier and cleaner. Oh, and it didn't smell like i was about to start anything on fire. You can see the burned looking part from the dremel on the left side here.
So I moved on to light sanding, and then I routed the edges with a small rounded corner bit. I also did this with my Dremel and my router table attachment. I have to say that the Dremel is probably the most versatile tool I own. I love the attachments and how easy it is to change between them.

Once it was all routed, I gave things another quick sand. I used the nail gun and some glue to assemble the base. Once it was all solid, one more quick sand to finish things off. This was my first chance trying out my new orbital sander. I had a sander, but I wore out the sanding head. And after replacing it, it wore out too fast for my liking. I think there is something internally wrong with it, so we just decided to order a new sander. I love new tools, but I dont like replacing them.
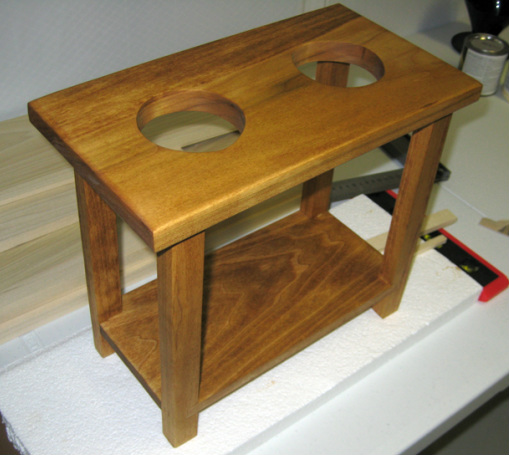
Once sanded, I gave it a coat of golden oak stain to make it look all sorts of pretty. Given this might be a little out of order, I have not attached the top yet, and i still need to fill a couple of holes from the staples, I really wanted to make sure the stain went on evenly. So I will be back soon with how I attached the top and finished this project up!
Once sanded, I gave it a coat of golden oak stain to make it look all sorts of pretty. Given this might be a little out of order, I have not attached the top yet, and i still need to fill a couple of holes from the staples, I really wanted to make sure the stain went on evenly. So I will be back soon with how I attached the top and finished this project up!

 RSS Feed